


Table of contents
- Pre-requisites
- Pre-installation
- For Dual Boot
- Booting Using Bootable Media
- Connecting To Internet
- Verify EFI boot
- Update Date & Time
- Create Disk Partitions for Arch Linux
- Format Partitions
- Mount Partitions to USB
- Setting Up the Fastest Mirrors
- Install Arch Linux to the root partition
- Generate File System Table
- Heading to Arch Linux :)
- Setting a System Language
- Setting Hostname and Updating Hosts
- Setup Timezone/Region
- Installing Grub Bootloader
- Enable System Services
- First visit to Arch System
I have been using Arch Linux for quite some time now. When I was trying to install Arch, I faced quite a few problems, there were a few that were not even addressed around the Internet. In this blog, I will try to guide and share my personal experience towards installing & setting up Arch Linux, which I think might be beneficial for beginners who are interested in Arch Linux.
Pre-requisites
Before getting started with installing Arch on our device, let's make everything ready for us to get booted in the Arch environment.
We will be needing
A Pendrive (8 GB or more)
An OS installed in the device
A stable internet connection
Assuming you have all these ready with you, let's jump to getting Arch installed on our device.
Pre-installation
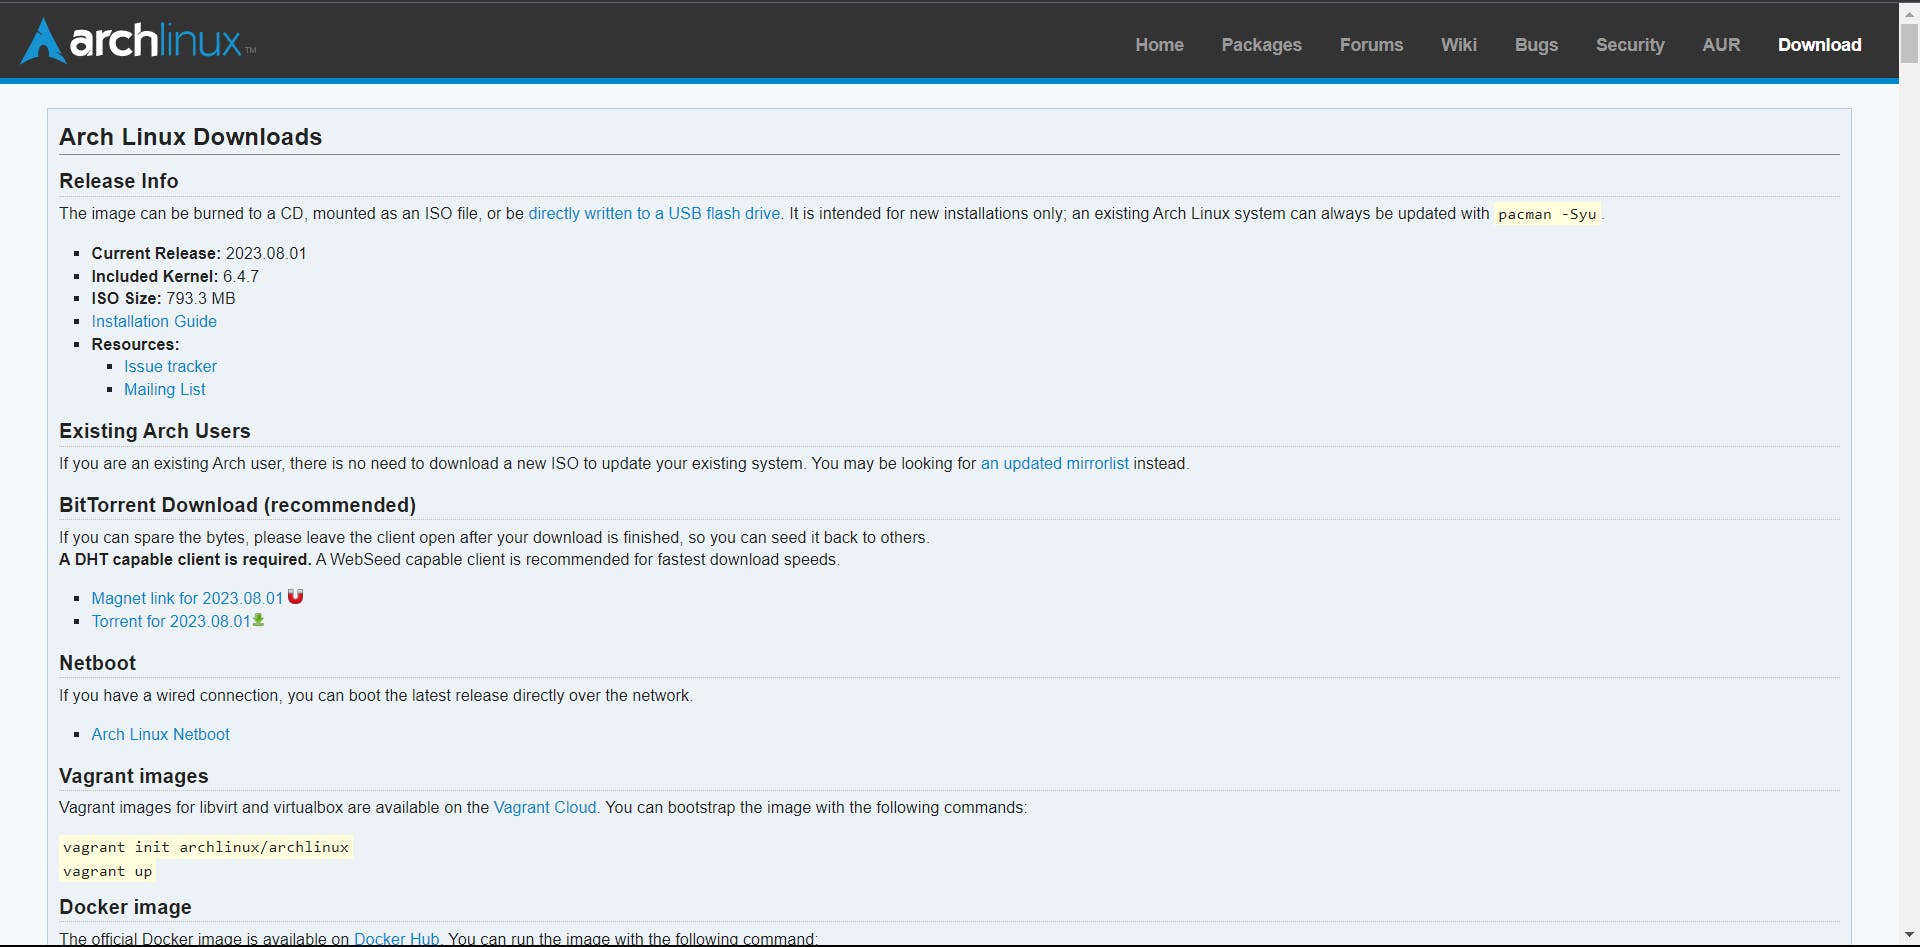
First, we will have to create a bootable USB drive, which will contain all the files and tools needed to install Arch on our device. Before that, we need to download the Arch Linux iso from the Arch Linux Download Page. Here, you can download the Arch iso file using the torrent File provided there. For downloading torrents, you need to have software like µTorrent or BitTorrent.
Now, for creating a bootable USB, we will be using Rufus. Alternatively, we can opt for Balena Etcher as well. The process is pretty much the same in both tools.
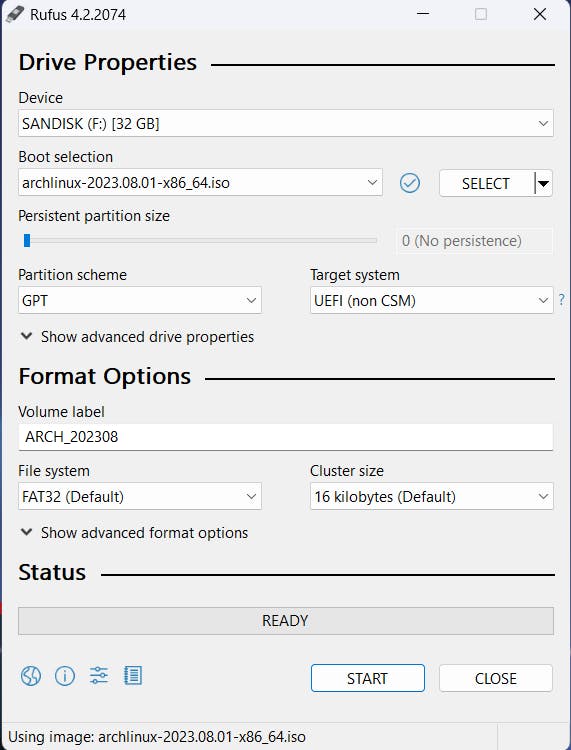
Your USB drive will be listed under the Device section. Under the Boot selection menu, select the Arch ISO file that you downloaded recently. Then, make sure to select the GPT option in the Partition scheme column, as devices now come with UEFI mode only. After that, you can just press the start button, and your bootable media will be created within a couple of minutes, depending upon your USB drive's speed.
After this, your media creation will be completed. If you want to install Arch as the only OS on your device, you are ready to do so now. However, those of you who want to dual boot your device with Arch and Windows will have to work on some more stuff.
For Dual Boot
Creating Partitions
For installing Arch and keeping Windows at the same time, you will have to create a separate partition where Arch will be installed properly.
Note: If you have multiple storage devices attached to your device, then it is recommended to create a partition from the same storage volume as where your Windows System is installed, otherwise it may lead to some problems in dual booting every time you try to boot your machine.
You can create partitions in the live environment as well, but beginners who are new to this stuff might find it difficult to do, and it can lead to data corruption as well if mishandled. Hence, it will be a wiser option to create a partition from the Windows environment.
Now, from the Windows menu, launch Create and Format Disk Partitions. We will be creating a partition using this tool only. There are other ways as well, like diskpart from Command Line Interface.
Select the drive from which you would like to make storage for your Arch OS. Right Click on it, and choose Shrink Volume to shrink the volume from the disk. I would recommend freeing at least 25 GB for Arch OS.
Disable Secure Boot
You need to disable the security boot option from the BIOS menu on your device. You can enter your BIOS menu while restarting. When it is booting up again, you need to hit the key which opens your BIOS menu. In most cases, it is either F2 or F11 . If it does not work, you can always google the keybinding for your device by going to the BIOS menu. This is just a safety precaution so that your dual booting will be successful, as it might pose challenges to be dealt with if kept on.
Turning off secure boot can be just a click away for some devices like Asus laptops. But it can also be a lengthy step like it is for HP devices, as it will require disabling the BitLocker encryption from your disks. You will be prompted to enter the BitLocker key, which you can find in your Microsoft account.
After disabling the Secure Boot option, press F10 to save and exit. This will reboot your device again, and you can let it restart to your OS once again.
Installation
After disabling secure boot, you are ready to install your new OS on your laptop. However, it can be scary, or frustrating for beginners, as you will be writing a lot of commands for setting up your OS to a basic level. I will try to guide you well and explain every step for your understanding.
Note- The mouse/Touchpad will for most the situation won't work after this step during the installation process. Bluetooth keyboards will not work as well, as you will be configuring this OS from the very beginning, which does not have any configuration for using Bluetooth devices.
Booting Using Bootable Media
The very first step in installing Arch into your device is to boot into the Arch bootable media that you created earlier. Plug in your USB drive, and reboot your device. Now while it's booting up again, press Esc key rapidly. It will open your booting menu and will ask you to choose which one you want to boot into.
You will be able to see your USB stick's name in that list, select that option using the arrow keys. After that, there will be a menu prompting various options for installing Arch on your device. The first option will be Arch Linux Install Medium or something similar.
Congratulations if you made it to a black screen with some welcome statements and a blinking cursor. The actual installation process begins here!
Now, you can use the command setfont ter-132n to increase the font size of the console.
Connecting To Internet
Now that everything's visible, the very first thing we need to do is to connect our device to the internet. If you have a LAN connection available to us, you can by all means skip the step and just attach your device with the LAN cable.
For those who don't have access to a LAN connection, we will be using iwctl to connect to the internet. First of all, type iwctl to go inside the iwctl menu. After that, type device list to get a list of devices. After getting your device name, type station <device> scan to scan available Wi-Fi networks around. Next, type station <device> get-networks to list all the available networks that were found while scanning. After that, type station <device> connect <SSID> to connect to your Wi-Fi network.
Verify EFI boot
This step checks whether the media you are using is legit or not. To check, type ls /sys/firmware/efi/efivars . If it shows a bunch of random texts, then you can rest assured that you downloaded a healthy OS.
Update Date & Time
This step can be considered optional, you can always do it later. Type timedatectl status to view the current time-zone's time and date. To change, you can use the command timedatectl set-timezone <Timezone>. You can list the timezones using the command timedatectl list-timezones.
Create Disk Partitions for Arch Linux
From this step onwards, all the steps will be important for installing Arch Linux on your device. You can type lsblk to list your connected drives. If all your drives are listed there, then we can proceed to the next step. You can check all your partitions for a particular drive using the command cfdisk <drive name>.
We will be creating 3 partitions for Arch: root directory for system files and software, home directory for our space, and swap for virtual memory. I would recommend keeping root for a minimum of 15GB, 10GB for home & 4 GB for swap memory. Of course, you can increase the storage in each as per your requirement if you would like that.
Using arrow keys, you will be creating partitions. The space you freed inside Windows will also be shown here. Create a new partition from that using arrow keys for the root directory. Similarly do it for creating spaces for home and swap as well. But, for the swap partition, change the size type to Linux Swap. After creating all 3 partitions, select write tab, and then type yes for confirmation. Then quit from the cfdisk page. Type lsblk again to see if the partitions you just created are listed or not.
Format Partitions
The partitions that you created now cannot be used as storage space. It needs to be formatted to the appropriate format to be used. Type mkfs.ext4 <Partition name> for root and home partitions. For swap partition, use mkswap <Swap Partition name>. Then to enable swap space, use this command: swapon <Swap Partition name> . You can check your swap space mounting point using lsblk.
Mount Partitions to USB
Now, let's mount the root and home partitions as well. Use the command mount <Root Partition> /mnt to mount the root partition. Then create a directory inside the mnt folder where you will mount the partition for home using the command mkdir /mnt/home. Then, mount the home partition using the command mount <Home Partition> /mnt/home. Validate your mounting points using lsblk.
Setting Up the Fastest Mirrors
In this step, you will be backing up some mirror lists that contain URL of the Arch Server, which is needed for updating and all. Type cp /etc/pacman.d/mirrorlist /etc/pacman.d/mirrorlist.bak to create a replica of already existing mirrorlist. Then go to the pacman.d directory using the command ls /etc/pacman.d. After that, update your packages using command pacman -Sy. Install a tool which will be used to filter fastest mirrors using the command pacman -S pacman-contrib. Then type rankmirrors -n 10 /etc/pacman.d/mirrorlist.bak > /etc/pacman.d/mirrorlist. Rankmirros will filter out 10 fastest servers of Arch and copy in the mirrorlist. It can be time taking.
Once it's done, you can list the servers using the command cat /etc/pacman.d/mirrorlist.
Install Arch Linux to the root partition
Till now, we were just using Arch inside the media, we have not installed it yet. We will be installing it now though. We will download all the required packages that will be needed for our Arch Linux system. Type the following command :
pacstrap -i /mnt base base-devel linux linux-lts linux-headers linux-firmware sudo nano git neofetch neovim networkmanager dhcpcd pulseaudio bluez amd-ucode intel-ucode
Note: In the command above, select either amd-ucode or intel-ucode based on your device, whether it is running on AMD processor or intel processor. Rest all are the basic packages which must be installed for the OS.
Generate File System Table
You need to create a fstab file, as it is an important config file that stores the mounting points for the partitions. Type this command to generate fstab file: genfstab -U /mnt >> /mnt/etc/fstab.
Heading to Arch Linux :)
Now that the minimum setup is completed, we can head to our Arch OS now. Type arch-chroot /mnt to get inside the Arch OS now. After that, type passwd to set password for root(admin) access. Then, create a standard user account, as we won't be using root everytime we use Arch, as even a small mistake can lead to drastic effects if done without thinking. Type useradd -m <User name> to create a user with a name of your choice. Set the password for the user using the command passwd <User name>. Then, provide some basic access to the user using the command usermod -aG wheel,storage,power <User name>. Now, edit the configuration file for sudo using the command EDITOR=nano visudo. It will open the visudo file. Inside that, find the line which starts with #%wheel ALL... , and remove the "#" to uncomment that line. After that, leave the editor after using Ctrl + O to save and Ctrl + X to exit. Now, the user that you just created will have access to sudo privileges.
Setting a System Language
Now that the user is created, we will be setting a language for the device. I will be guiding for English-US, if you want to use any other language for your device, then just do what I am doing after finding the specific language you would like to use. Type nano /etc/locale.gen to list all the languages available. Then, uncomment en-US.UTF-8 UTF 8, and save-quit using Ctrl+O & Ctrl+X. Then generate your locale using command locale-gen. Further, type the commands echo LANG=en_US.UTF-8 > /etc/locale.conf , to add language in the locale configuration file. Then type export LANG=en_US.UTF-8.
Setting Hostname and Updating Hosts
As it says in the heading, we will be setting the hostname for our device and updating hosts for the device. Type echo <Host name> > /etc/hostname to add the hostname for the device. Then, for updating the hosts, open the hosts file using the command nano /etc/hosts, and add the following lines
127.0.0.1 localhost
::1 localhost
127.0.1.1 <Hostname>.localdomain localhost
After adding these lines, save and quit nano editor using Ctrl+O & Ctrl+X.
Setup Timezone/Region
Type the following commands:
ln -sf /usr/share/zoneinfo/<Zone> /etc/localtime
hwclock --systohc
Installing Grub Bootloader
Grub is what we call a boot manager for Linux which is usually used when implementing multi boots in a device. It runs at the very beginning of the computer, allowing you to choose which OS you'd want to boot into. Here's how you can set up your Grub:
So at first, let's create a directory in /boot/efi using the following command:
mkdir /boot/efi
This directory will be then mounted to the EFI partition that will already be available in your system if you have windows installed in your device. Type lsblk and look for a partiton with size from 100MB-500MB, depending on your device, and mount the above created directory in that partition using the following command, after replacing <EFI partition directory> with the actual location of that directory, for eg /dev/sda1 :
mount <EFI partition directory> /boot/efi/
Now with that, mounting for boot is done, let's move ahead with installing required packages for our grub setup:
pacman -S grub efibootmgr dosfstools mtools
This will install most of the necessary packages you'll need for grub setup. Now, there will be some files created upon installing the above packages, we need to edit one of them so that our grub gets triggerred every time on boot. Type the following command:
nano /etc/default/grub
Go to the bottom of that file, & uncomment GRUB_DISABLE_OS_PROBER=false . After that install os-prober package which will allow your system to detect if your system has multiple OS installed, and if there are, it will show in the list as well:
pacman -S os-prober
Now type the following commands one by one to install grub successfully which will automatically detect Windows OS as well, and list in the grub menu everytime you boot your system.
grub install --target=x86_64-efi --bootloader-id=<hostname> --recheck
grub-mkconfig -o /boot/grub/grub.cfg
Enable System Services
Now you have your grub installed in your device. For the final touch, you need to enable some services at this point, to set network configuration in your system. For that type the following 2 commands:
systemctl enable dhcpcd.service
systemctl enable NetworkManager.service
Now your system is ready to use. You need to exit current environment using exit command, and unmount using the following command
umount -lR /mnt
Now, type reboot and press enter. During reboot, eject your pendrive. Now, if you have followed me with all these steps, congratulations, your arch system is now ready to use. After reboot, you will see your grub bootloader screen which lists both your Windows & Arch OS.
Below are some of the very basic stuff you might need to know if you're new to Command Line Interface.
First visit to Arch System
Connecting to internet
nmcli device wifi list
nmcli device wifi connect <SSID> password <password>
Creating a Desktop Environment
No one likes to just live on terminal world right? You can install a "Desktop Environment" which basically allows you to have minimal or more Graphical Interface, depending on what you want... There are plenty of Desktop Environments available on Internet, but I have found the following Desktop Environments to be better than others. It's a personal choice though, you might have different likes than me:
DWM: One of the best tiled Window Manager, it's minimal,and is good for usage. It was my first Desktop Environment that I used when I first installed Arch in my device. If you want more features in your Environment, you can always check out the patches provided by DWM from here. One of the best terminal for DWM environment is ST, it is also very minimal and is easy to use.
BSPWM.): It is similar to DWM, it is also a minimalist tiling window manager which uses X window system. You can easily install this by following the documentation provided in the official website. Here's the link.You can use Alacritty as your terminal for this window manager.
OpenBox: It also has a very minimalistic appearance. I haven't used this Window Manager for much time, but you can check out the themes section to guide yourself to install OpenBox successfully. You can use Alacritty as your terminal here as well.